Pressure Washing Before Painting: A Pro’s Guide to a Flawless Finish
There is nothing more frustrating than watching your beautiful new exterior paint job begin to chip, bubble, and peel just a year or two after application. This common problem almost always points back to one overlooked detail: improper surface preparation. Many homeowners wonder if this step is truly necessary, but the secret to a durable, professional-looking finish lies in one critical, non-negotiable task. A thorough decision to pressure wash before painting is the foundation of a project that lasts and protects your investment.
This isn’t just about rinsing off some dust; it’s about creating the ideal canvas for new paint to properly adhere. In this guide, we’ll draw on our professional experience to show you exactly why this step is essential. You will learn the correct techniques to avoid damaging your siding, how to determine the proper drying time, and how to feel confident that your home is perfectly prepped for a flawless finish that will boost its curb appeal for years to come.
Key Takeaways
- A meticulously clean surface is the non-negotiable foundation for an exterior paint job that won’t chip, peel, or fail prematurely.
- Learning how to properly pressure wash before painting is critical; using the correct technique and pressure prevents costly damage to your home’s siding.
- Common, easy-to-make mistakes can force water behind siding or damage wood, leading to expensive repairs and compromising your new paint.
- Understanding the risks, time commitment, and equipment costs of DIY helps you decide if hiring an experienced professional is the right choice for your project.
Why Pressure Washing is a Non-Negotiable Step for Lasting Paint
A fresh coat of exterior paint is one of the best investments you can make in your property’s curb appeal and protection. However, the success of that investment hinges on one crucial, often overlooked step: a thorough cleaning. To get a durable, professional finish, you must pressure wash before painting. Paint is formulated to bond directly with a stable substrate, not with the layers of dirt, grime, and failing paint that accumulate on your home’s exterior over time.
Skipping this essential preparation is like building a house on a faulty foundation-it’s destined to fail. Proper surface preparation protects your investment by ensuring the new paint adheres correctly and lasts for years, not just a single season.
Creating the Ideal Canvas for Paint Adhesion
Think of your home’s exterior as a painter’s canvas. You would never apply fresh paint to a dusty, dirty surface and expect a flawless result. Even walls that look clean to the naked eye are covered in a thin layer of grime that will prevent proper paint adhesion. A simple rinse with a garden hose only wets this buildup; it lacks the force to strip it away. A professional pressure wash, however, uses a powerful stream of water to create a perfectly clean, slightly porous surface that gives the new paint primer and topcoat an ideal texture to grip onto. For anyone unfamiliar with the process, understanding the pressure washing basics reveals why it’s so much more effective than other cleaning methods.
Removing Years of Grime, Mildew, and Chalking
Over the years, your home’s exterior becomes a collection point for numerous contaminants that are disastrous for a new paint job. A meticulous pressure washing removes these adhesion-killers completely:
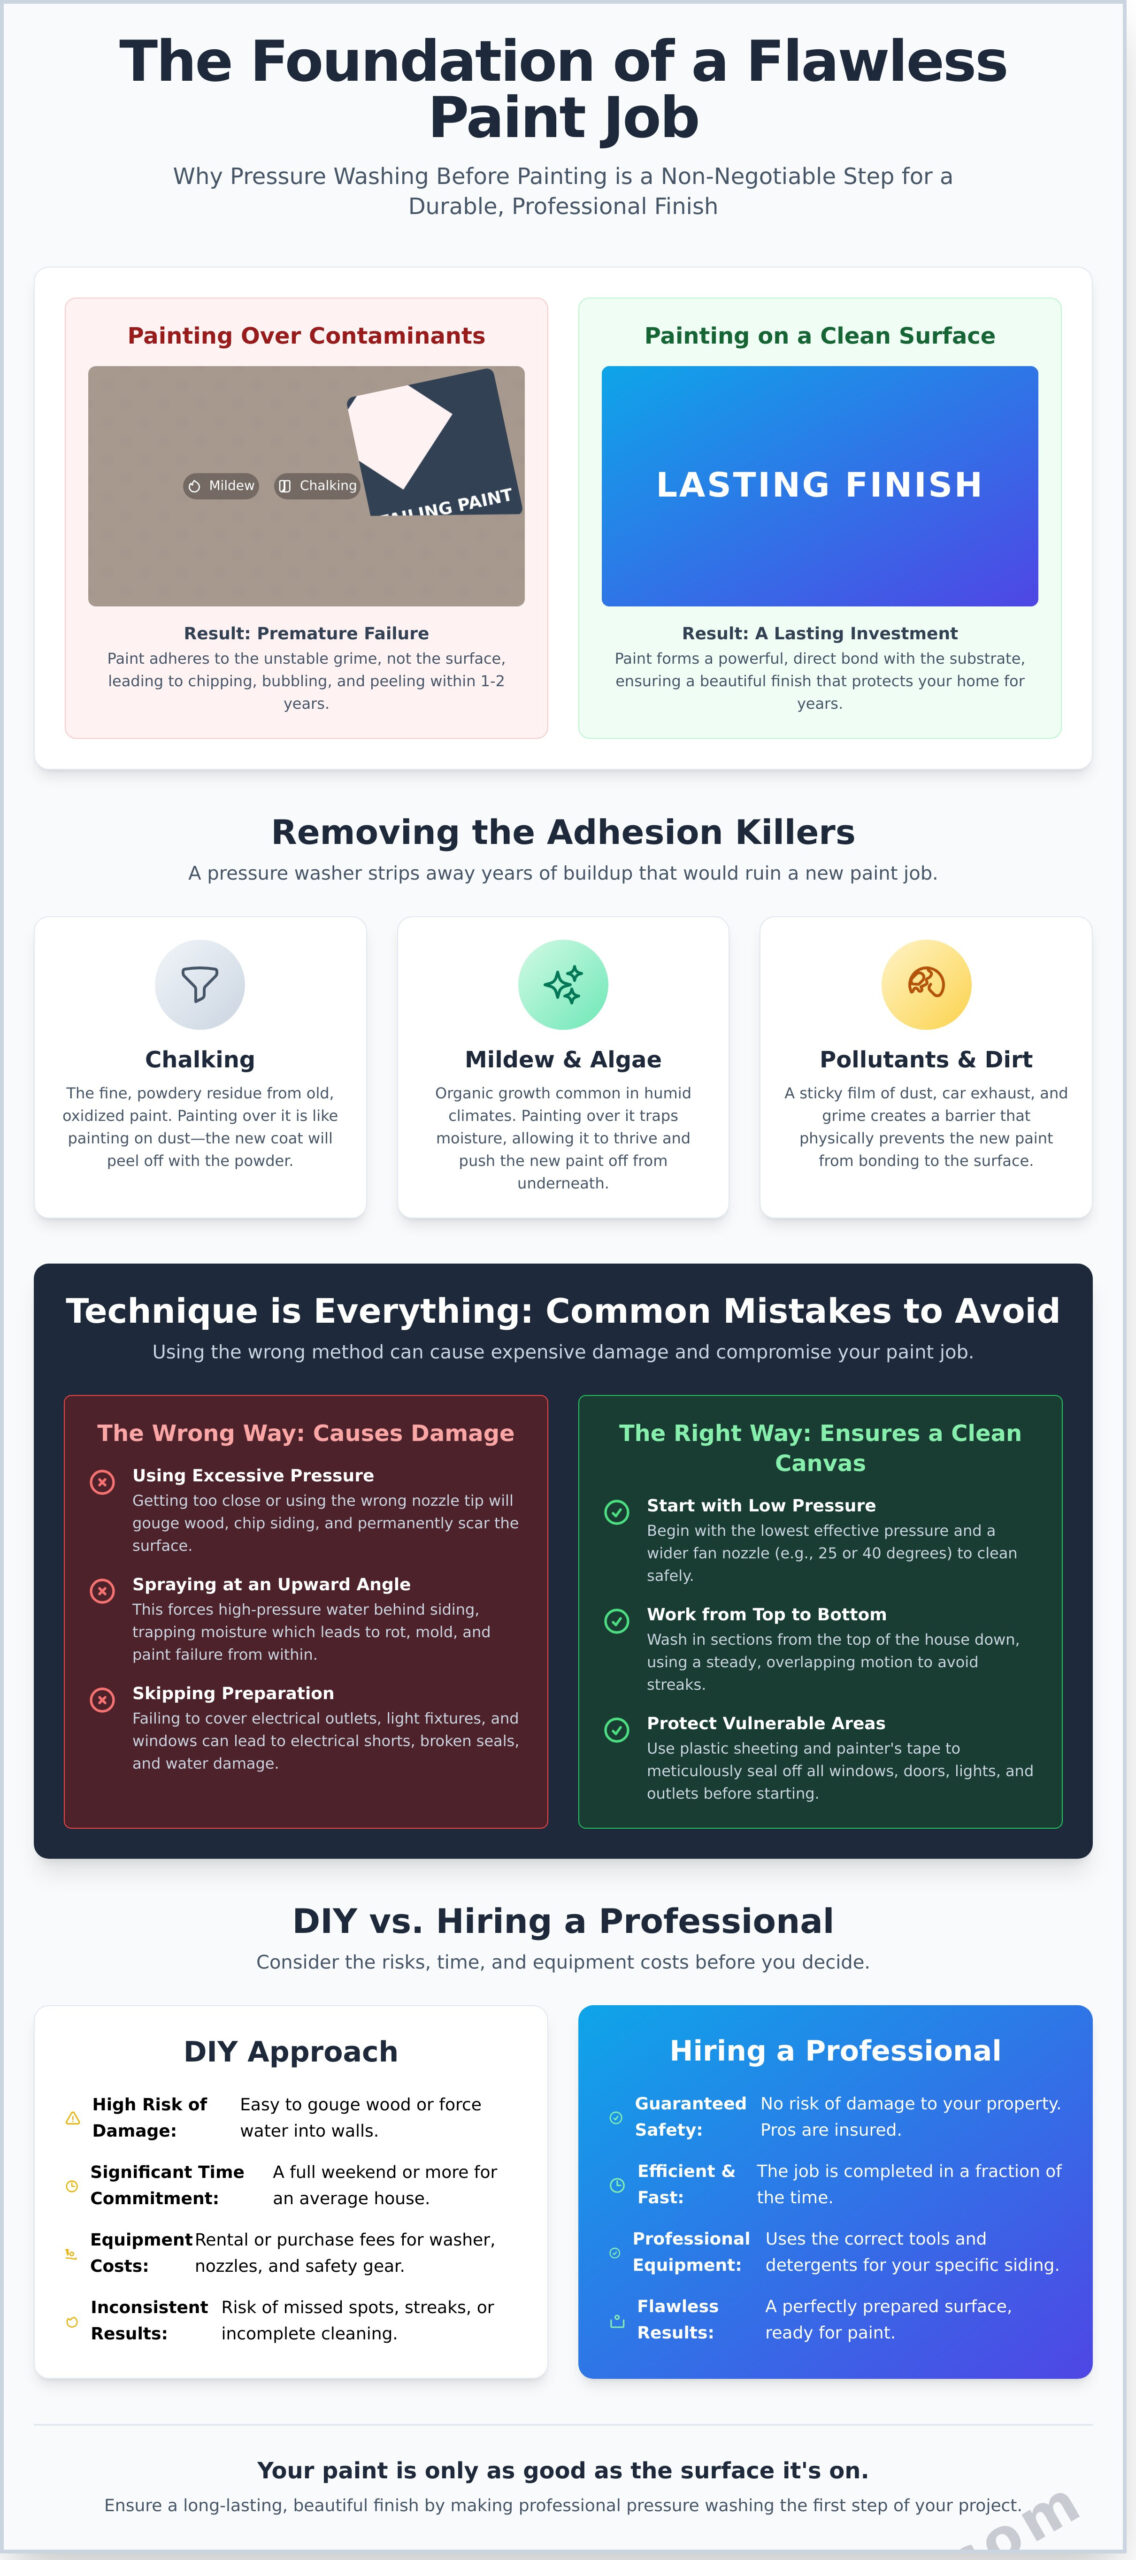
- Chalking: This is the fine, powdery residue that forms as old paint oxidizes and breaks down from sun exposure. Painting over chalk is like painting on dust-the new coat will stick to the powder, not the wall, and will quickly peel away.
- Mildew and Algae: In humid climates like we have in Florida, green and black stains from mildew and algae are common. Painting over this organic growth simply traps it, allowing it to continue thriving and push the new paint off the surface from underneath.
- Pollutants and Dirt: A sticky film of dust, pollen, car exhaust, and general dirt builds up over time. This grimy layer creates a barrier that prevents the new paint from forming a strong bond with the surface.
Ultimately, the decision to pressure wash before painting is what separates a short-term touch-up from a long-lasting, professional-grade finish. It is the single most important step in ensuring your paint looks beautiful and protects your home for its full lifespan.
How to Pressure Wash Your House for Painting: The Professional Method
A successful paint job is built on a flawless foundation. When you pressure wash before painting, you are not just cleaning; you are preparing the surface for maximum paint adhesion and longevity. Following a professional, methodical approach ensures you get a thorough clean without causing costly damage to your home’s exterior. This process protects your investment and guarantees a beautiful, lasting finish.
Step 1: Preparation and Safety First
Meticulous preparation is the hallmark of any professional job. Before you even turn on the machine, take these critical safety and prep steps to protect your property and yourself:
- Cover and Protect: Use heavy-duty plastic sheeting and painter’s tape to seal off all windows, doors, light fixtures, and electrical outlets. Water forced into these areas can cause significant damage.
- Clear the Area: Move patio furniture, grills, potted plants, and any other outdoor decor a safe distance away from the house. Cover delicate landscaping with tarps.
- Prioritize Personal Safety: Always wear safety glasses or goggles to protect your eyes from debris and water spray. Non-slip, closed-toe footwear is essential for maintaining a firm grip on wet surfaces.
- Inspect for Damage: Walk the perimeter of your home and look for any cracked siding, loose mortar, or damaged wood. Pressure washing can worsen these issues, so they should be repaired before you begin cleaning.
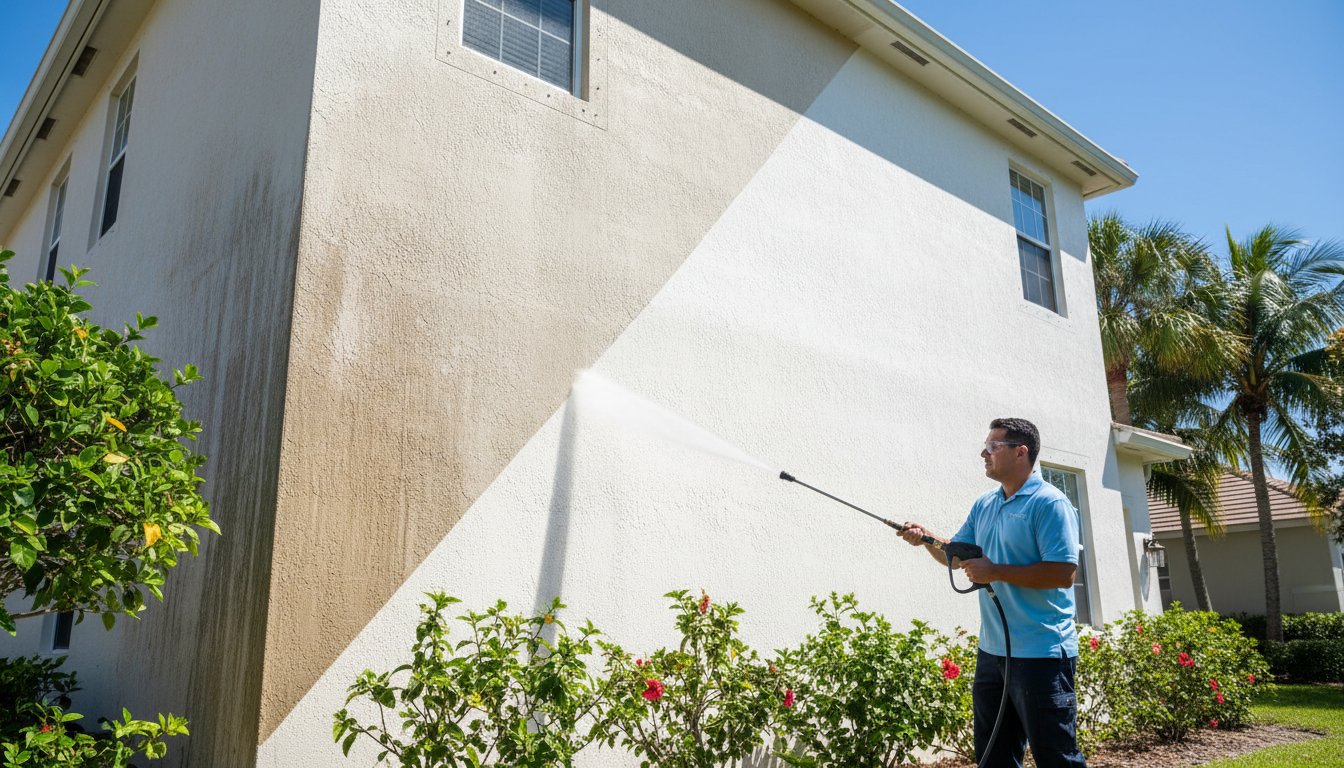
Step 2: Correct Washing Technique
Using the right technique is crucial to avoid gouging wood, chipping paint, or forcing water behind your siding. The goal is to clean the surface, not strip it. Start with the lowest pressure setting that effectively removes dirt. While many DIY articles explain the basics, a trusted guide on how to pressure wash a house can provide excellent visual references for proper form and handling. For best results, follow these professional standards:
- Begin with a wide-angle nozzle, either a 25-degree (green) or 40-degree (white) tip, to disperse the pressure over a larger area.
- Always spray at a downward angle. This prevents water from being driven up and under the laps of your siding, which can lead to mold and rot.
- Work from the top of the house down in manageable, overlapping sections to avoid streaks.
- Maintain a consistent distance of 2-3 feet between the nozzle and the wall, keeping the wand in constant motion for an even clean.
Step 3: The Critical Drying Phase
The final, non-negotiable step when you pressure wash before painting is allowing the surface to dry completely. Painting over a damp surface traps moisture, which will inevitably cause the new paint to bubble, blister, and peel. This single mistake can ruin an entire project.
As a general rule, wait at least 24 to 48 hours in warm, dry, and sunny conditions. However, this timeline can be much longer. Homes in shady areas, humid climates, or with porous surfaces like wood or brick may require 3 to 5 days to dry fully. For a definitive, professional-grade assessment, use a moisture meter. This tool gives a precise reading, ensuring the siding’s moisture content is low enough for paint to properly bond.
Common Mistakes to Avoid When Pressure Washing Before Painting
A pressure washer is a powerful tool, but in inexperienced hands, it can cause expensive and irreversible damage to your home’s exterior. The goal is to create a clean, sound surface for new paint to adhere to-not to create more repair work. To protect your investment, it’s crucial to avoid these common pitfalls that can turn a simple prep step into a costly disaster.
Here is our professional checklist of what not to do when you pressure wash before painting.
Using Too Much Pressure (The #1 Mistake)
The most frequent error we see is using excessive water pressure (PSI). This doesn’t clean better; it destroys surfaces. High pressure can easily gouge wood siding, crack vinyl, chip stucco, and permanently etch concrete. It’s the difference between cleaning and stripping. A key rule: never use a zero-degree (red) nozzle on any part of your house. It concentrates the stream into a blade-like jet that will cause immediate damage.
Spraying at an Upward Angle
Always direct the spray at a downward angle. Spraying upward forces high-pressure water behind siding panels, under eaves, and into soffit vents. This trapped moisture becomes a breeding ground for mold and mildew and can lead to structural rot inside your walls. This mistake also compromises the seals around windows and doors, creating leaks that may not be apparent until long after the paint job is finished.
Not Allowing for Adequate Drying Time
Painting over a damp surface is a guarantee for paint failure. Even if a wall feels dry to the touch, porous materials like wood or stucco can hold moisture for days. Trapped water will prevent the new paint from bonding correctly, leading to blistering, peeling, and chipping within months. Patience is essential. Depending on the material, humidity, and sun exposure, you must wait at least 24 to 48 hours for the surface to dry completely.
Proper preparation is the foundation of a durable, beautiful paint job. Avoiding these mistakes is critical, but managing the equipment, pressure, and techniques requires experience. Worried about the risks? Get a professional quote from PBC Pressure Cleaning.
DIY vs. Hiring a Professional: Making the Right Choice
When it’s time to prepare your home’s exterior for a fresh coat of paint, you face a key decision: tackle the cleaning yourself or hire a professional. While the DIY route can seem like a way to save money, it’s important to weigh the full scope of the project before you commit to spending your weekend on a ladder.
The True Cost of a DIY Project
A DIY pressure washing job involves more than just a trip to the rental store. The “affordable” rental fee is only the beginning, and the true costs quickly add up:
- Equipment & Supplies: Beyond the washer, you’ll need to purchase the correct detergents, nozzles, safety goggles, and potentially rent a taller, safer ladder for second-story work.
- Time Investment: For an average-sized home, this is a significant commitment-often a full weekend or more of strenuous, time-consuming labor.
- Risk of Damage: One wrong move with a high-pressure stream can etch wood, shatter a window, or force water behind your siding, leading to mold and costly repairs that far exceed the price of a professional service.
The Value of a Professional Service
Hiring an experienced company is an investment in quality, safety, and efficiency. A professional team arrives with commercial-grade equipment that provides a more thorough and consistent clean than consumer-grade rentals. More importantly, they bring the expertise needed to properly pressure wash before painting without causing damage.
When exploring professional options, it’s useful to understand the full scope of what a dedicated painting service includes, from meticulous prep work to the final coat. To see what a comprehensive project looks like, you can find out more and get a better sense of the standards involved.
Our licensed and insured technicians at PBC Pressure Cleaning understand the precise techniques required to remove stubborn grime, mildew, and chalking paint. We complete the job in a fraction of the time, protecting you from liability and freeing up your weekend. For a truly seamless project, we can bundle our meticulous cleaning with professional painting services, ensuring a flawless, long-lasting finish from a single, reliable team.
While a DIY approach has its place, the preparation for an exterior paint job is critical to the final result. Opting for a professional to pressure wash before painting provides unmatched value by guaranteeing the job is done right, protecting your home, and delivering a perfectly clean surface. To ensure your investment is protected, contact us today for a professional consultation.
Ensure a Lasting Paint Job with Professional Preparation
Ultimately, a flawless and long-lasting paint job begins long before the first brushstroke. As we’ve detailed, proper surface preparation is the most critical factor in ensuring your new paint adheres correctly and withstands the Florida elements for years. Avoiding common mistakes like using the wrong pressure or failing to remove all contaminants is the difference between a project that looks great and one that truly lasts.
To guarantee an outstanding result, it is essential to professionally pressure wash before painting. For homeowners in Palm Beach County, PBC Pressure Cleaning offers a seamless, expert solution. With over 43 years of dedicated experience, our licensed and insured team specializes in both the meticulous cleaning and professional exterior painting your property deserves. We protect your investment by creating the perfect canvas for a beautiful, durable finish.
Don’t leave the most important step to chance. Let our team provide the thorough preparation your home needs to look its absolute best. Request Your Free, No-Obligation Estimate Today! and take the first step toward a stunning exterior you’ll be proud of.
Frequently Asked Questions About Pressure Washing Before Painting
What PSI is safe for washing a house before painting?
For most home siding like vinyl or stucco, a pressure setting between 1,500 and 2,000 PSI is generally safe and effective. However, softer surfaces like wood or older brick require a much gentler approach, often below 1,200 PSI. Using the wrong pressure can cause significant damage. A professional service will use the correct pressure and nozzle for each surface, often employing a soft wash technique to ensure a thorough clean without risking harm to your property.
How long should you wait to paint after pressure washing?
You should wait at least 24 to 48 hours after pressure washing to begin painting. The surface must be completely dry to ensure the new paint adheres properly. In humid climates like we have here in Florida, it may take longer. Painting over a damp surface can trap moisture, leading to blistering, peeling, and premature paint failure. It’s always best to check a shaded area for any lingering dampness before you start your painting project.
Do I need to use soap or a special detergent when pressure washing?
Yes, using a cleaning solution is essential for a truly clean surface. Water alone cannot effectively break down and remove stubborn contaminants like mildew, algae, oil, and chalky paint residue. A professional-grade, biodegradable detergent ensures all grime is lifted away, creating a pristine surface that allows for maximum paint adhesion. This step is critical for achieving a durable, long-lasting, and beautiful paint finish that protects your investment.
Can I just use a powerful garden hose instead of a pressure washer?
While a garden hose can remove loose surface dirt, it lacks the power to strip away the embedded grime, mildew, and oxidized paint that interfere with paint adhesion. A pressure washer provides the necessary force to properly clean and prep the surface for a new coat. Skipping this step and relying on a hose often leads to a poor paint job that will quickly peel and chip, costing you more time and money in the long run.
Is it okay to pressure wash wood siding before painting?
Yes, you can pressure wash wood siding, but it requires extreme care. Wood is a soft material that can easily be splintered, gouged, or damaged by high pressure. When you pressure wash before painting wood, it is crucial to use a low PSI setting and a wide-angle nozzle. For homeowners in Palm Beach County, hiring a professional who understands the proper soft washing technique is the safest way to get the wood clean without causing costly damage.
What’s the best time of year to pressure wash and paint my house in Florida?
The ideal time to pressure wash and paint in Florida is during the drier, less humid months, typically from late fall through spring (October to May). This period offers more predictable weather with less chance of rain and lower humidity, which allows the siding to dry thoroughly after washing. These conditions also help the new paint to cure correctly, resulting in a more durable and professional-looking finish for your home.
Recent Comments